How To Create A Recipe!
Step 1: Log In
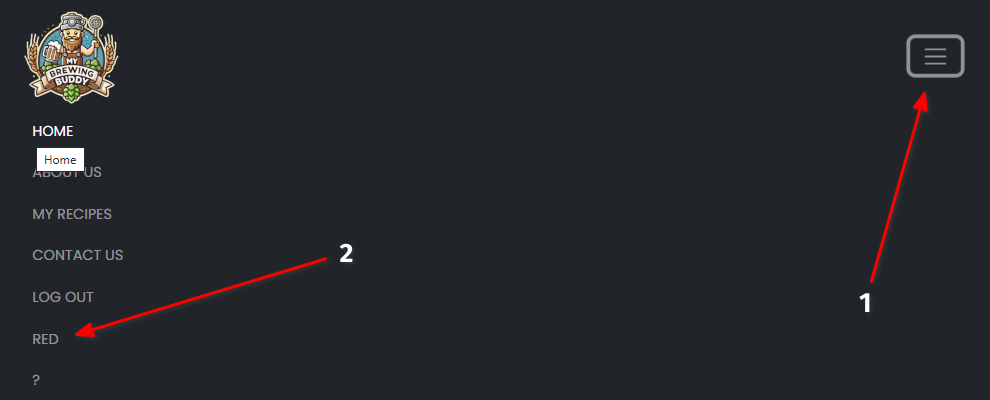
To view, edit, or create a recipe, you must first log in to your account. Not sure if you’re already logged in? Check the top-right corner of the screen for your username (see Illustration 1).
Alternatively, click the hamburger menu icon. If you’re logged in, your username will appear at the bottom of the menu (see Illustration 2). Verifying your login status ensures full access to all recipe features and editing tools.

If your username does not appear in the menu, you are not currently logged in. Click the Log In button to proceed. This action will open the My Brewing Buddy login screen (see Illustration 3), where you can enter your credentials to access your account.
Logging in ensures full access to recipe tools, personalized features, and saved brewing data.
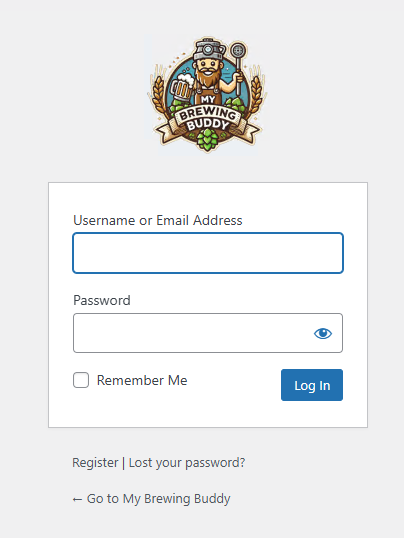
On the login screen, you can enter either your username or your email address, followed by your password. If you’ve forgotten your password, click the “Lost your password“ link to reset it. New users can select the “Register” link to create an account.
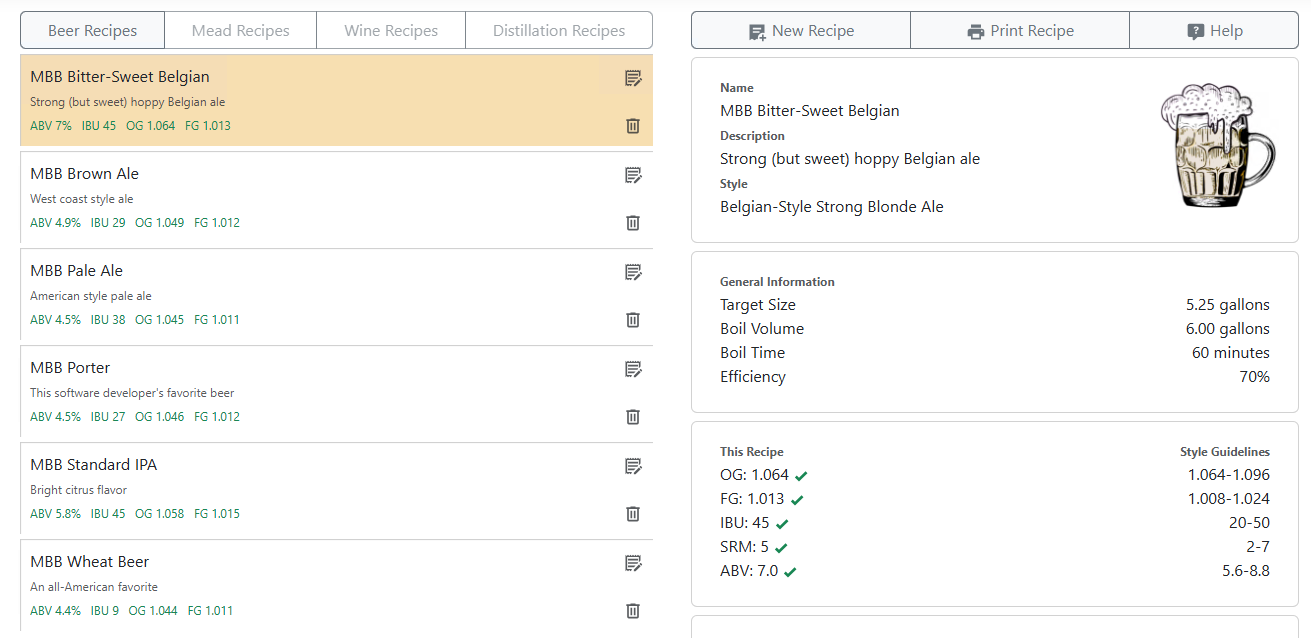
After logging in for the first time, you’ll be automatically redirected to the “My Recipes“ page. There, you’ll see six generic recipes provided by My Brewing Buddy (see Illustration 4). You have full control—keep these recipes, modify them to suit your preferences, or delete them entirely to start from scratch.
Step 2: Creating Your First Recipe
Now that you’re logged in, you’re ready to create your first recipe. At the top of the My Recipes page, you’ll see buttons that let you choose the type of recipe you want to make: Beer, Mead (also used for Cider), Wine, or Distillation.
Choose the recipe type that fits your project. For this walkthrough, we’ll use Beer as an example. Just above your recipe list, you’ll also find a “New Recipe” link. Click this link to start building your recipe. You’ll then be taken to the Edit Recipe screen (see Illustration 5), where you can customize your ingredients, steps, and notes.

Begin by entering a Recipe Name and a brief Description for your recipe. Use the dropdown menu to select the appropriate Style. In this example, we chose American-Style Lager, but you should pick a style that best matches your creation.
Next, adjust the Target Size, Boil Volume, Boil Time, and Efficiency fields to fit the specifics of your brew. Accurate settings help ensure your brewing calculations are correct and that your final product meets expectations.
Now it’s time to add grains to your recipe. Click the “Add” link under the Grains section (see Illustration 5). Doing so will open the Grains Editor (see Illustration 6), where you can select and customize the grains for your brew.
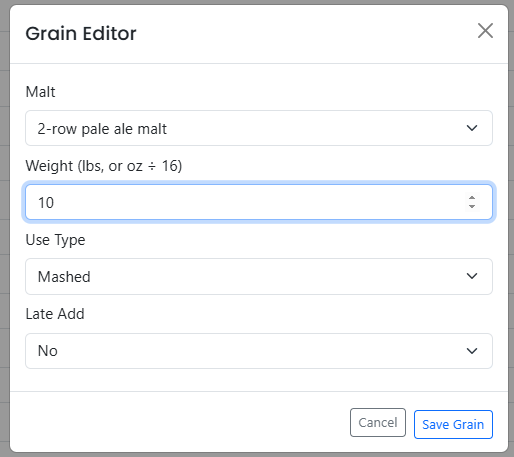
For our sample recipe, we are selecting 10 pounds of 2-row pale ale malt. Use the dropdown menu to choose the grain you want to add. Set the grain weight in the provided field. Remember, the weight is entered in pounds. If you need to add 8 ounces, simply enter 0.5.
Once you have entered the grain and its weight, click “Save Grain” to add it to your recipe. Repeat this process for each grain you plan to include. Adding grains accurately ensures your final beer meets your flavor and strength targets.
After you finish adding grains, it’s time to add hops. Click the “Add” link in the Hops section (see Illustration 5). This action will open the Hops Editor (see Illustration 7), where you can begin selecting your hops and customizing your hop additions.
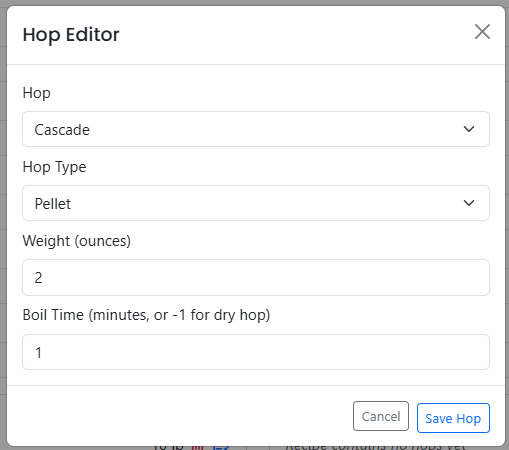
In our sample recipe, we are adding 2 ounces of Cascade hops. Use the dropdown menu to select the hops you want to include. Set the hop weight by entering the number of ounces in the weight field. Unlike grains, hops are measured directly in ounces, so no conversion is needed.
After entering the information, click “Save Hop” to add it to your recipe. Repeat this process for every hop variety you plan to use. Each addition allows you to fine-tune bitterness, flavor, and aroma.
Once your hops are added, it’s time to select a yeast strain. Click the “Add” link under the Yeast section (see Illustration 5). This will open the Yeast Editor (see Illustration 8), where you can choose and customize the yeast for your brewing project.
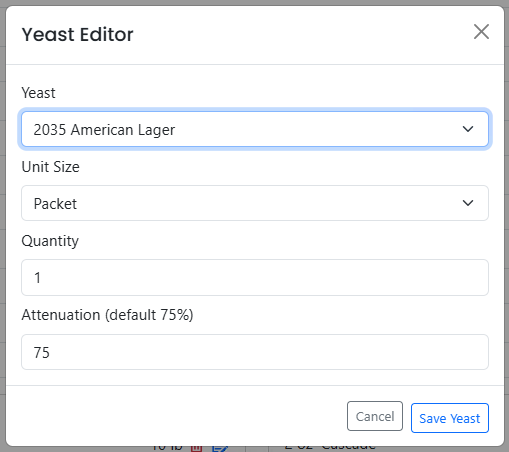
In our sample recipe, we are using 1 packet of American Lager yeast. Use the dropdown menu to select the yeast you want to add to your recipe. Set both the quantity and the unit size to match your needs.
After entering the yeast information, click “Save Yeast” to add it to your recipe. Repeat this step for each yeast strain you plan to use. Accurately listing yeast ensures that fermentation proceeds smoothly and that your final product develops the desired flavor and aroma.
Next, add any miscellaneous ingredients required for your brew. Click the “Add” link under the Misc section (see Illustration 5). This action will open the Misc Item Editor (see Illustration 9), where you can add items like spices, fruit, or brewing salts to complete your recipe.
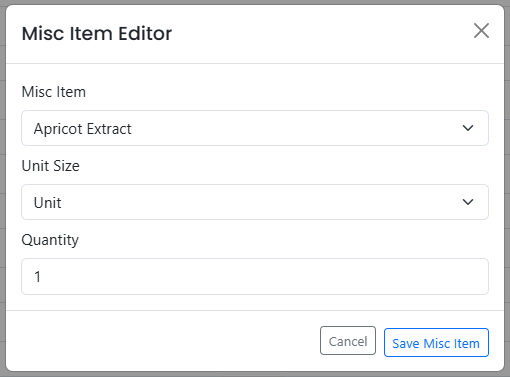
In our sample recipe, we are not adding any miscellaneous items. However, this section is where you can include adjuncts and non-fermentable ingredients in your brew.
Use the dropdown menu to select the item you want to add. After choosing your ingredient, set the Unit Size and Quantity according to your recipe’s needs. Once everything is entered, click the “Save Misc Item” button to add it to your recipe. Each addition helps you fine-tune flavor, body, or fermentation characteristics.
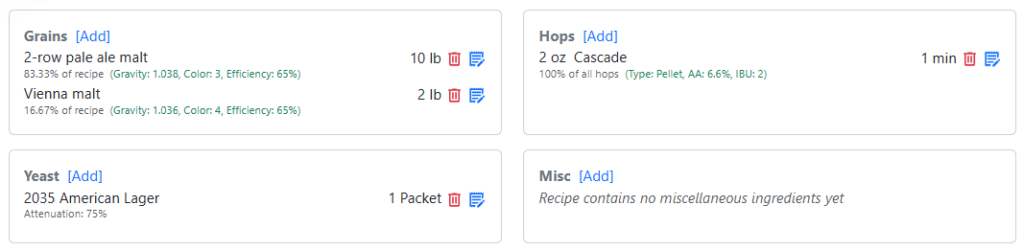
Congratulations — you now have all the ingredients entered for your recipe! Below, you can see what the completed ingredient list looks like for our sample recipe. Notice the detailed information filled in for each item (see Illustration 10).
Now it’s time to add notes to your recipe. Scroll to the bottom of the Edit Recipe screen, where you’ll find the Recipe Notes text box (see Illustration 5).
This section is a free-form text area that allows you to add multiple lines of information. Use it to record important details about your recipe, brewing process, special techniques, or fermentation notes. Clear and detailed notes make it easier to recreate or improve the recipe later.
Make sure your notes fully describe both your recipe and your brewing steps to help guide future batches.
Step 3: Save Your Recipe!
The final step is saving your recipe. This is crucial to ensure you don’t lose any of the work you’ve completed. To save your recipe, click the “Save Recipe” button located at the bottom right-hand corner of the Edit Recipe screen.
After saving, you can edit your recipe as often as needed. You also have the option to print it directly to a printer or save it as a PDF for easy access. Your recipe will remain stored and available anytime you need to view or update it.
Congratulations — you now have your recipe securely saved on My Brewing Buddy!